Crimp Tool Overview
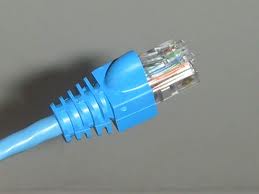
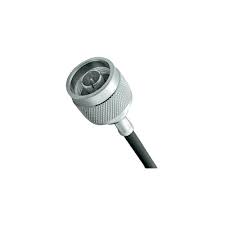
Cables with various connectors attached to them are commonly used in every day applications. We use a special cable to connect the handset to our telephone device and another cable to establish an Ethernet connection. Cables with RF connectors (BNC, N type, etc.) are used everywhere.
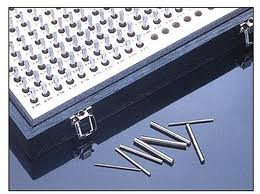
There are of course simple electrical connections which use standard wires with connectors such as the ones presented in the following image:
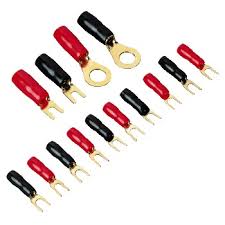
In the past, most of these connectors were attached to the corresponding cable by using the soldering method. Nowadays, in order to reduce the time required to create cable assemblies, crimp tools are used to perform this job.
Types of Crimp Tool
A crimp tool is a device used to make connections between two items using compressive force to constrict or deform a specially designed connector element. Crimp tools are designed for the connection of electrical and metal components by cutting, stripping, bending, and deforming. There are various types of crimping tools depending on the die of tool, which vary depending upon the item to be crimped. As a portable, cold-working technique, crimping is extensively used in the electrical and metal-forming industries. Crimping was developed as a high-quality, low cost replacement for soldered terminations.
We can originally divide the crimp tools into the following major categories:
Handheld Manually Operated
These are the most common of these two groups and they are of the hand operated varieties which are generally used to crimp smaller electrical connections. They are portable, inexpensive, and effective and they usually have interchangeable die-sets.
Handheld Electrically Operated
They are very similar to the manually operated ones, but these ones are battery powered.
Hydraulic Handheld
Hydraulic crimp tools are hand operated and pump hydraulic fluid into the device to compress the die. Despite being hand-driven, effort is considerably less than other manual crimpers.
Benchtop Manual
These crimp tools are handled manually, but they require significantly less force compared to handheld, manually activated crimpers.
Benchtop Electric
A fixed-speed motor drives this crimper type that has high quality crimps, is efficient and is capable of high production rates.
Pneumatic Mountable
They usually make use of a source of pressurized hydraulic fluid to execute the crimp and are typically used for joints which are too robust to crimp by hand. These crimp tools can be handheld or clamped into place on a workbench.
Crimp Tool Terminal Types
Except of the aforementioned categories, crimp tools can be separated based on the type of the terminal that has to be attached to the cable. We can briefly mention the following types of terminals (connectors) which vary depending upon the type of cable being worked with, and thus different crimping tools and their associated dies differ accordingly:
- BNC
- Fiber Optic
- Telephone
- RF
- D-sub
- DIN
- Modular / RJ
- Military
Do I Need To Calibrate Crimp Tools?
There are several international standards which describe the requirements of crimp connections quality. Depending on the application, some of them are stricter than others. So the question that arises is “Should I calibrate my crimp tool?”
The answer in the question would be “yes”, although a crimp tool cannot actually be calibrated since it is not a measuring device. But it can be adjusted and verified against the manufacturer’s specifications.
Crimp Tool Calibration Standards
Since the manually operated crimp tools are the ones that are more commonly used, let’s see how they are tested and calibrated.
User Periodic Testing
In order to verify that a crimp tool operates correctly, there are some tests that a user can perform before staring a series of crimping connections. The most common test is the one that uses a “go / no-go” gauge. This gauge has two machined ends. One end should fit through the closed jaws of the tool and the other end should not. The go / no-go gauge (which is similar to the one represented in the following picture) often comes together with the crimp tool and is supplied by the tool’s manufacturer.
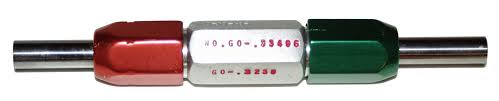
But this test is only performed by the user of the crimp tool in order to periodically check that the tool functions as expected.
Traceable Calibration Certificate
Usually the manufacturers of these tools specify that after a period of time or a number of crimps the tool must be calibrated. This means that it must be sent to the suitable calibration laboratory which has the appropriate measuring equipment and trained personnel to perform the calibration procedure. The laboratory must have traceability to national standards and established procedures. When the calibration is finished, a calibration certificate will be issued which will mention the measurements performed, the standards used, the environmental conditions during the calibration, the measurement uncertainty and all other necessary information required by ISO 17025 “General requirements for the competence of testing and calibration laboratories”.
Crimp Tool Calibration Procedure
The most frequently employed procedure for calibrating crimp tools uses pin gauges.
A pin gauge is similar to a gauge block. It is a precision ground cylindrical bar for use in go / no-go tests or similar applications.
Depending on the opening of the crimp tool and the manufacturer’s instructions, the appropriate diameter pin gauges are selected. It must be noted that the calibration technician must squeeze the handles together completely and hold them in this position. Never close the indenter directly onto a gage pin. This will most likely damage the tool or render it inoperative.
Once the proper pin gauge is selected we proceed as follows:
1. While holding the indenter closed, insert the proper gague pin through the indenter opening as shown above. The gage pin should be a slip fit through the indenter tips with no sloppiness or free play.
2. Should the tool need adjusting (if adjustment is applicable), release the handles to the open position.
3. Adjust the crimp tool according to the manufacturer’s specifications.
The above steps are repeated until the desired measurement is performed.
For crimp tools with many openings, the aforementioned procedure must be repeated for each opening separately by using the appropriate pin gauge.
This is usually the calibration procedure for crimp tools. But sometimes, depending on the application, this may not be enough. Some calibration laboratories perform also tests on the crimped joints produced by the crimp tool. These tests can be either non-destructive (dimensional measurement of the joint by using calibrated digital callipers or micrometers), or destructive (bending tests, mechanical strength tests, electrical characteristics tests, pull force tests, etc.)
Depending on the relevant international standard about crimp joints, the user of the crimp tool must decide which calibration procedure is suitable and send the tool to the appropriate calibration laboratory at the time intervals specified by the manufacturer of the crimp tool. We can be sure that our crimp connections are correctly carried out, as long as our crimp tool is periodically calibrated!
Written by Sofia